Friday, May 13, 2011

Pink.. Loves.. Brown...


1) Pink Card Stock- Tear ONLY the top edge of your polka dot Decor Fabric- place that on the bottom half of your page.
2) Placing a long strip of double sided tape in the center of the decor fabric all the way across. Now I can use my beautiful brown ribbon- Start from one corner and fold little chunks until you reach the other end.
3) FLOWERS! Using your scalloped edge crepe paper- scrunching the bottom edge until round- glue the edge of the petals together and you have your flower! Do the same for the other two flowers, place them onto your page.
4) Glue your pearls and your all done!

Green Polka Dot- Butterfly Trail


1) Green Card stock- First place your moss green Polka Dot Decor Fabric onto your page.
2) Cut out 3 scallops on your Brown Splatter Mesh- place that on the left side of your page.
3) Using your round BLING and the copper Leaf Ribbon- hoop the green bling through your ribbon all the way through.
4) Now Assemble the Butterflies! *)One large green and small white *) one small green and one small white *) One large White and one small green
Layer all your pieces together and you should have 2 large butterflies and 1 small.
5) Cut out 3 pieces of the green wired trim. Fold one in half in a shape of a V and curl the ends and place it underneath your butterfly for your Antennas. Do the same for the other 2 butterflies.
6) Glue the pearl string in the middle of your butterflies! 4 goes on the large butterflies and 3 goes on the small butterflies. Place them onto your page and your all done! :)

1) Blue Card Stock- First place your fancy Decor Fabric to your page.
2) Using your Crepe, cut out 3 scallops just on top. Glue that across your page.
3) Glue or Staple your Crazy Mesh across your page.
4) Same thing with your Brown Leaf Ribbon, you can either use glue or staple (because it won't show, you will be covering it with BLING and your flower on the left)
5) Now the fun part! Using your wired ribbon peek out the wire from ONLY the bottom on both ends. Holding both strands (don't let go) slowly pull the wire away from the ribbon untill you can't anymore. Then you just need to play with it till it's a shape of a flower.
6) Glue the beautiful flower onto your page, add bling and your all done! :)

Vintage Butterfly!

Vintage Butterfly Make & Take! This was a popular one, it was made with out "Deco Fabric" which is the blue background, and underneath is a strip of our brown splatter mesh, and right above is our  blue and gold crazy mesh! The butterflies are die cut with our "Crepe Paper" and "Splatter Mesh" all we did was run both fabrics through the Sizix Die Cut Machine and got our butterflies, just layer it together and you have your beautiful, different, textured butterflies!

Mother's Day Love


1) Pink Card Stock- Pink leaf Decor Fabric
2) Pink Jute mesh straight across (strip couple strands from the top of your fabric- this will be used for the center of your heart)
3) Using the light and dark pink PAPER BLOOM flowers, glue the flowers into a heart shape onto your page.
4) While assembling the heart, use the couple strands from the Jute Mesh and tuck it under one of the flowers on the left corner of the heart.
5) Place the 3 green leaves on the bottom right corner in a shape of a triangle.
6) Using the round pearl string, use 4 and twist the wires together to make a shape of a circle or flower.
7) after gluing the pearl string to your page now you can now place your 3 light pink paper blooms and right below 2 dark pink paper blooms, and then your all done! :)

Cute as a BUTTON!


1) Green Card Stock
2) Moss Decor Fabric (placed by using "Double sided tape" on all four corners)
3) Natural Burlap placed right across the page
4) Along with the brown ric-rac ribbon
5) 3 green leaves on the right bottom corner
6) now the fun part, place your felt flowers and butterflies to your page, like in the picture.

Monday, February 28, 2011

Couture Rosetta Trim


 COUTURE ROSETTA TRIM
Comes in all these wonderful colors, check out our samples, there are many different ways to use them.

Pouty Face!

Pouty Face, created by our design team -
There are beautiful details in this page, like the green polka dot "deco fabric" on the right, natural color "burlap trim" all around, orange daisies, and you can't forget the dragonfly!

Scrapbook Expo- Anaheim

Vintage Butterfly Make & Take! This was a popular one, it was made with out "Deco Fabric" which is the blue background, and underneath is a strip of our brown splatter mesh, and right above is our  blue and gold crazy mesh! The butterflies are die cut with our "Crepe Paper" and "Splatter Mesh" all we did was run both fabrics through the Sizix Die Cut Machine and got our butterflies, just layer it together and you have your beautiful, different, textured butterflies!

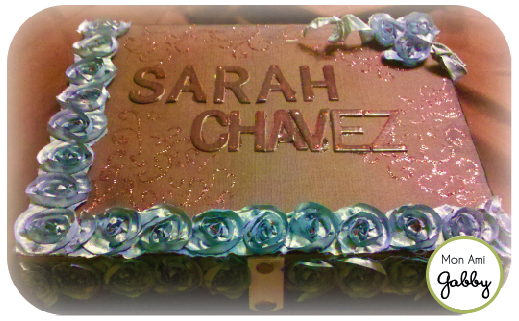
 Everyone went CRAZY for this page, we sold out the next day! The background has our beautiful rose pattern "deco fabric". The flowers on the page are our "Paper Bloom"flowers the Large and Medium size. Right underneath at an angle is our lavender lace trim with a lace flower to the right side (which is made with our lace trim). Last but not least on the left side beneath the Large Paper Blooms is our pearl trim, we just made a bow like and tucked it right underneath the flowers.


This page is made with our famous "Couture Rosetta Trim". Deco fabric is the background, and we just cut out stripes of the Rosetta Trim and placed it on the page like an L shape, and cut out 3 singles and placed it on the top right side of the page. Add your two butterflies, distress the edges with ink and your good to go! Short and Sweet!

Rose Garden!

Princess Butterfly!
(FYI our "Crepe Paper" and "Splatter Mesh run great through the Cricket, Cuddle Bug, and many other die cut machines")

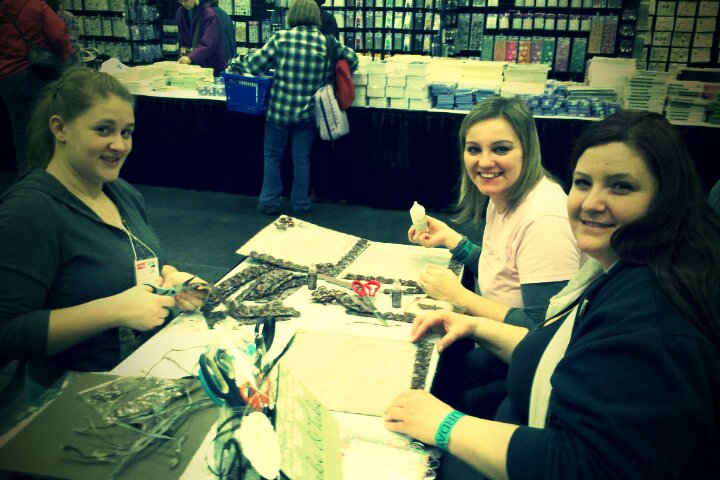
These two ladies are the sweetest! They won our  gift basket with lots of Mon Ami Gabby goodies from the raffle!